I have been grilling in my backyard for going on 22 years, and the single fix that saved more of my vegetables than any technique was a non-stick grill mat. In that time I have burned ribs, under-smoked brisket, and cracked a cast iron grate by getting the coals too hot. I have made every mistake you can make on a charcoal grill. But the mistake that bothered me most, the one that happened every single summer for years, was watching a pound of asparagus slowly sink through the grates and disappear into the coals below. You spend real money on fresh vegetables, you toss them with olive oil, you get that grill dialed in at 400 degrees, and then half of them are gone before you flip a single piece. If that sounds familiar, you are in the right place.
Grilling vegetables is not hard once you understand why they fall through, which vegetables are high-risk, and how to set up your cook so nothing gets lost. This guide walks you through exactly that, step by step. I also want to tell you about the tool that changed my vegetable cooks completely, because once I started using it I genuinely could not believe I cooked without it for so long.
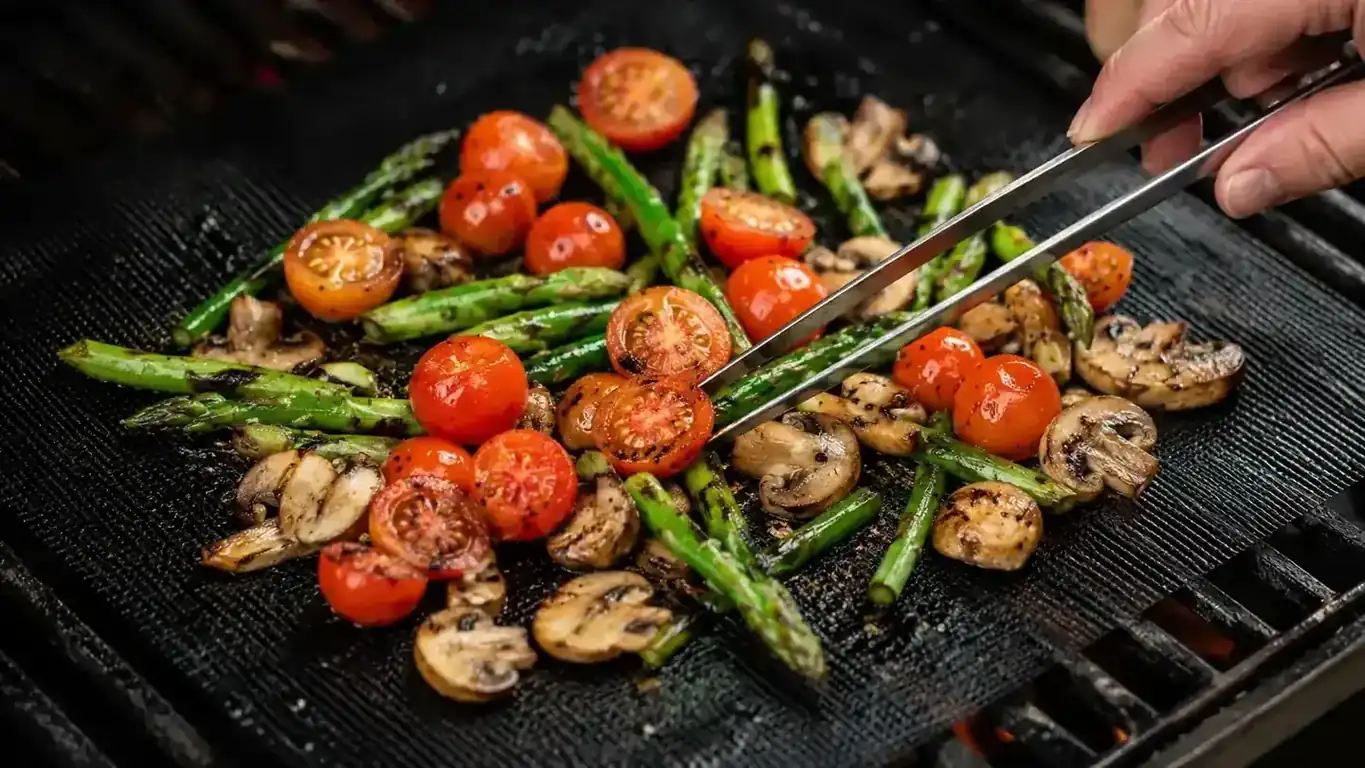
Still losing mushrooms and asparagus to the coals? This non-stick grill mat set is the fastest fix.
The Grill Mat Set of 6 gives you 100% non-stick reusable mats that sit right on your existing grates. No special grill required. Works on gas, charcoal, or electric. Over 25,000 Amazon reviews and 4.6 stars. Set of six mats so you always have a clean one ready.
Amazon Check Today's Price on Amazon →Step 1: Choose the Right Vegetables and Cut Them Correctly
Not every vegetable is equally dangerous on a grill grate. The ones that fall through most often are small, round, or cut into thin pieces. Asparagus spears under half an inch thick, sliced mushrooms, diced onions, cherry tomatoes, and zucchini rounds thinner than a quarter-inch are all likely to go sideways on you. The fix starts before you even light the charcoal.
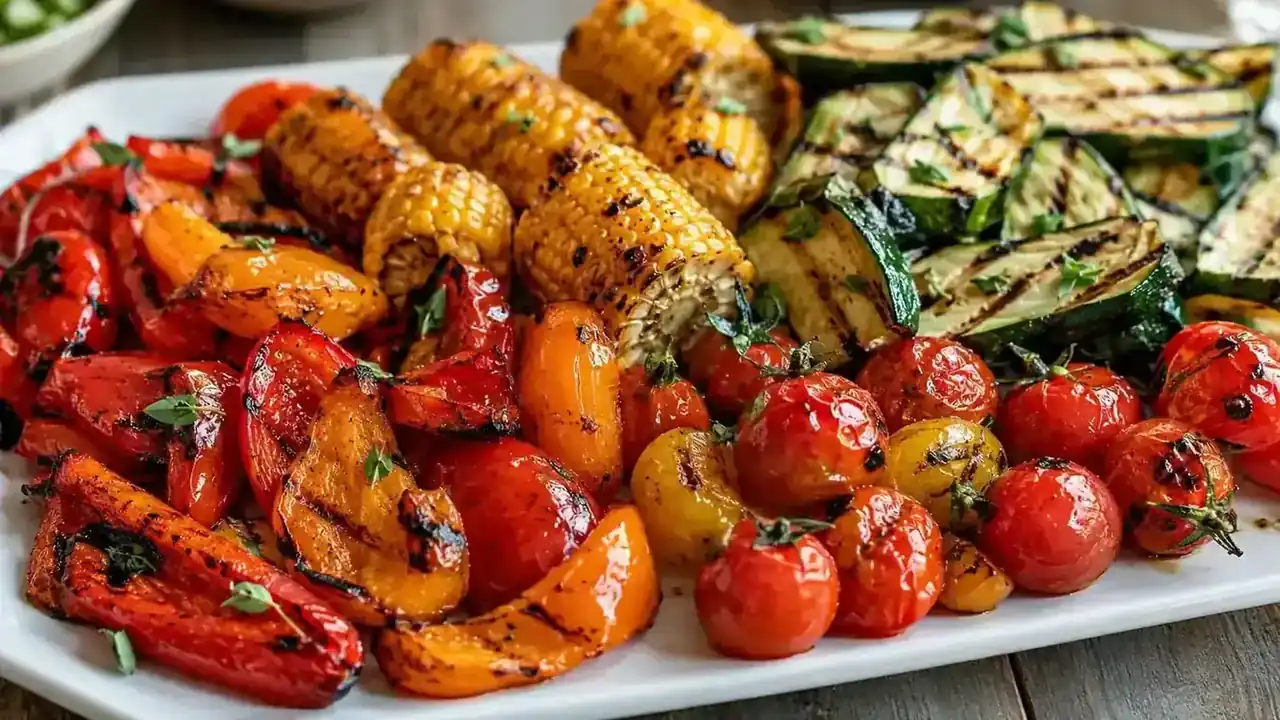
For zucchini and yellow squash, cut lengthwise into planks at least a third of an inch thick, not rounds. Planks sit flat on the grate and do not roll. For bell peppers, quarter them and keep the flesh in large flat sections. For mushrooms, use whole caps and place them gill-side up. For asparagus, select spears that are thick enough that they cannot pass through a standard grate gap, usually pencil-thickness or wider. For onions, cut them into rings or thick half-moons and skewer them horizontally if you want them to stay together. Corn goes on the grill whole in the husk and never has a falling problem. Cherry tomatoes belong on skewers or on a grill mat, full stop.
The basic rule: if a piece of vegetable can fit between your fingers held tight together, it can fall through a grill grate. Cut bigger, or use a mat.
Step 2: Prep Your Vegetables So They Do Not Stick, Steam, or Burn
Vegetables need fat to grill well. Without oil, the natural sugars on the surface scorch instead of caramelizing, and the flesh dries out before it cooks through. I use olive oil for most vegetables because I like the flavor, but any high-smoke-point oil works fine. Brush it on or toss the vegetables in a bowl and season generously with salt and black pepper. If you are doing a marinade, drain off the excess before grilling. Wet vegetables steam instead of sear, and steaming on a grill is just a slow way to get mushy food.
Let your vegetables sit at room temperature for 20 minutes after oiling. Cold vegetables straight from the refrigerator hit a hot grate and the outside chars before the inside warms up. This matters more with thick pieces like eggplant rounds or portobello caps. Room temperature going onto the grill means the inside cooks through at the same rate the outside gets color.
Step 3: Get Your Grill to the Right Temperature and Set Up a Two-Zone Fire
Most vegetables want a medium-high grill, somewhere between 375 and 425 degrees Fahrenheit. Too cool and they go limp and pale. Too hot and the outside burns before the inside is tender. On a charcoal grill, I use a full chimney of lit coals and spread them in a single layer across about two-thirds of the grate. That gives me a hot zone for direct grilling and a cooler zone to move things to if they are charring too fast. On a gas grill, medium-high on all burners works for most vegetables, with one burner dialed back as your refuge zone.
Let the grill preheat with the lid on for 10 to 15 minutes before you add anything. The grates need to be fully hot or your vegetables will stick, even if you oiled them well. A hot grate creates a sear that releases food naturally. A lukewarm grate grabs on and tears. You can test the temperature with your palm held 3 to 4 inches above the grate. If you can hold it there for 3 seconds before it gets uncomfortable, you are close to the right zone. If 2 seconds is all you can stand, it is probably too hot for delicate vegetables.
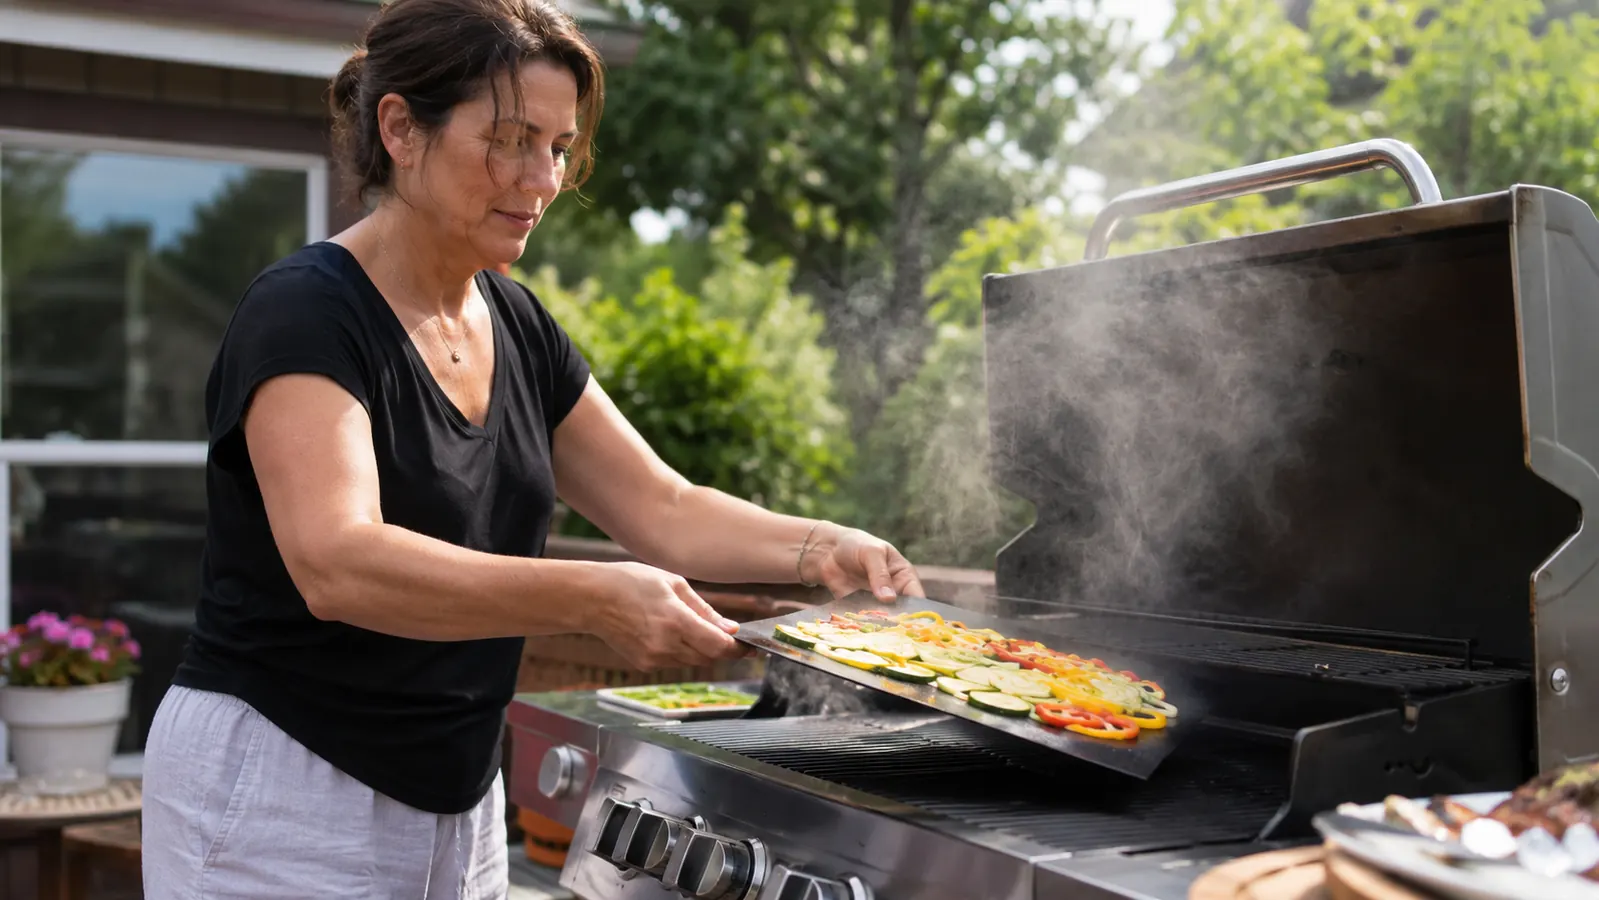
Step 4: Use a Non-Stick Grill Mat for the High-Risk Vegetables
Here is where I want to be straight with you. I resisted grill mats for years because they felt like a cheat, like I was turning my grill into a frying pan. Then my neighbor brought a set of them to a cookout at my house, and I watched him lay down asparagus, cherry tomatoes, and sliced scallions right on the mat and flip them without losing a single piece. I borrowed one for the rest of that cook and I ordered my own set the next morning.
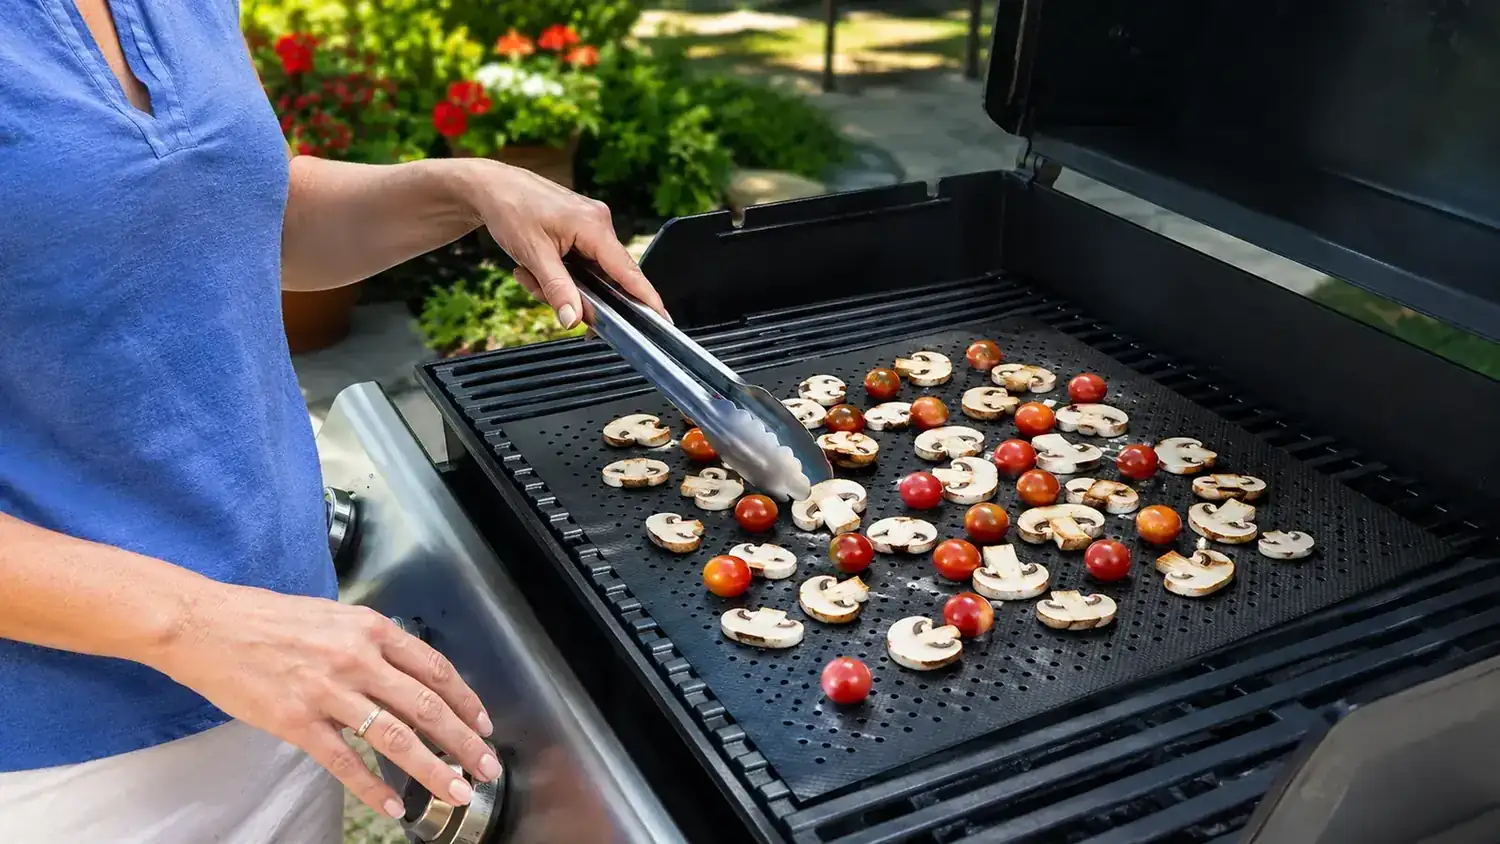
The set I use and recommend is the Grill Mat Set of 6 from Amazon. Each mat is 15.75 by 13 inches, which covers a solid portion of any standard grill grate. They are 100 percent non-stick, rated for temperatures up to 500 degrees Fahrenheit, and reusable. After a cook, you wipe them down with a damp cloth or run them through the dishwasher. A set of six means I always have a dry, clean one ready to go without hunting for a mat that got put away greasy. Over 25,000 people on Amazon rate this set 4.6 stars, and based on two summers of regular use, I think that rating is fair. They work as advertised, they hold up to repeated use, and they cost less than a bag of charcoal.
A grill mat does not make you a worse griller. It makes you the griller who does not lose half their asparagus every time.
Lay the mat directly on your preheated grates. Give it about two minutes to heat up before you add food. Then spread your vegetables in a single layer with a little space between each piece. Crowding a grill mat is the same as crowding a skillet: the moisture has nowhere to go and you end up steaming instead of searing. Flip the vegetables once or twice using a thin spatula. The non-stick surface releases everything cleanly. When you are done cooking, slide the mat off and let it cool before cleaning.
Step 5: Know When Each Vegetable Is Done
This is the step most people skip, and it is the one that causes the most bland, mushy, or raw results. Vegetables do not need a thermometer the way meat does, but they do need a defined doneness target. Undercooked grilled vegetables are crunchy and taste raw in the middle. Overcooked ones fall apart and lose their flavor. The window in between is actually pretty wide once you know what to look for.
Asparagus is done when the spears have light char marks and bend slightly when you pick one up with tongs, but still hold their shape without flopping. Zucchini planks are done when they have visible grill marks and a fork slides through without resistance. Mushroom caps are done when they have shrunk noticeably, released their liquid, and look glossy rather than pale and dry. Bell peppers are done when the skin has blistered and blackened in spots and the flesh feels soft when you press it. Corn is done when the husks are charred on the outside and the kernels inside are steamy and sweet, which usually takes 15 to 20 minutes with the lid closed. Cherry tomatoes on a mat are done in 4 to 6 minutes when they start to burst and collapse. Pull them before they fall apart completely.
The two biggest timing mistakes I see: pulling vegetables too early because they look done on the outside but are still raw in the middle, and leaving them on too long while waiting for more color. Trust the texture, not just the color.
What Else Helps
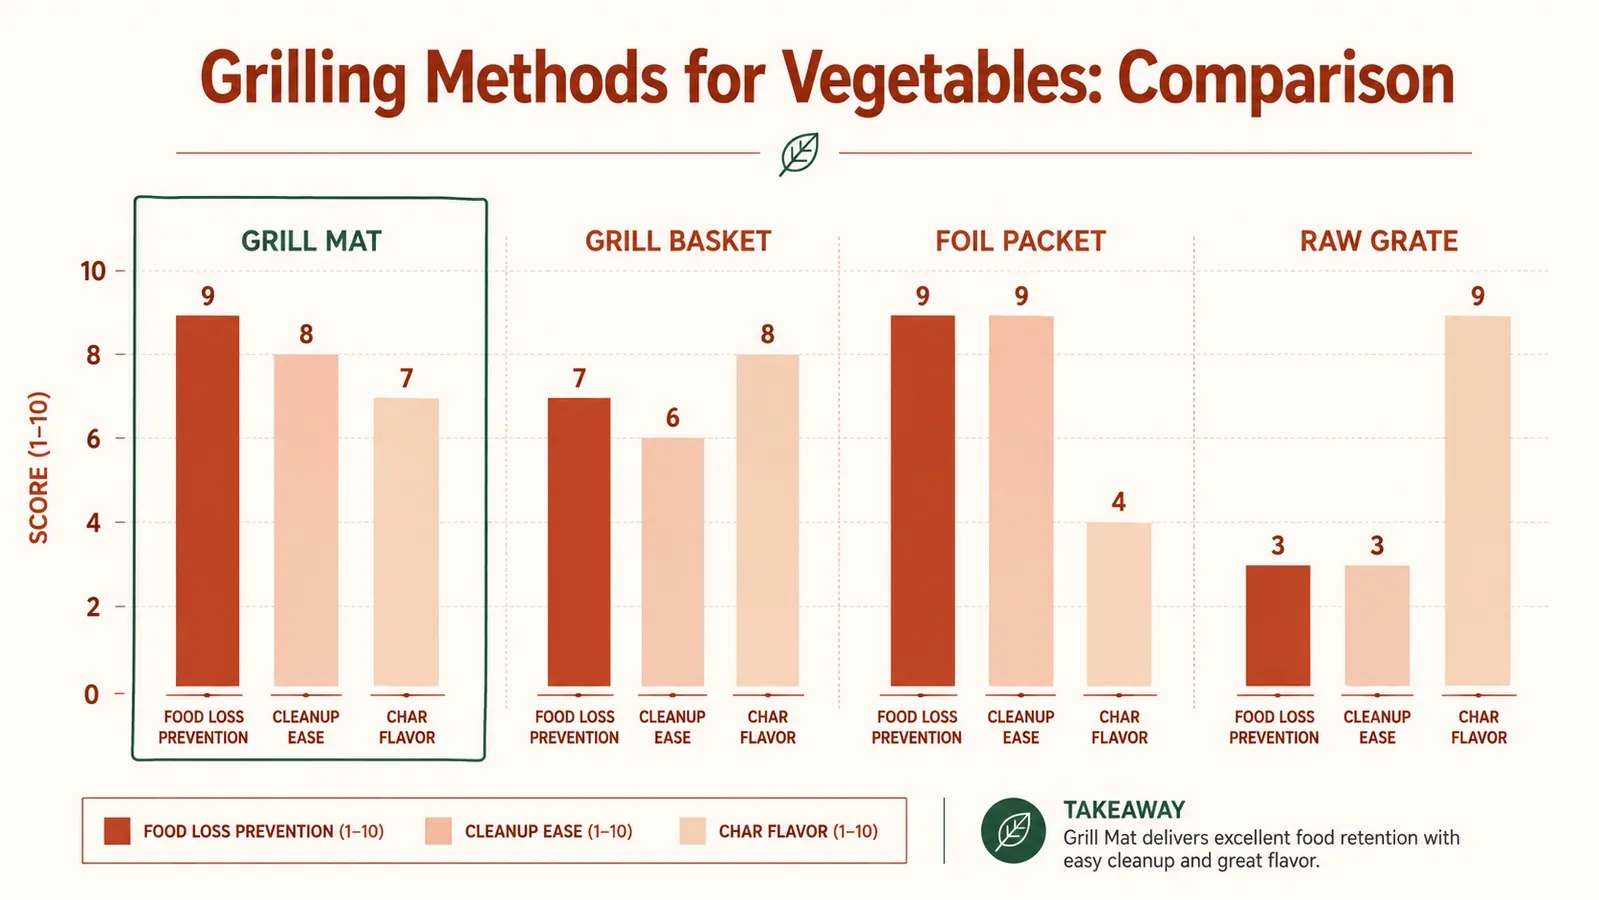
A few things that have improved my vegetable cooks over the years, beyond the basics above. First, a wire vegetable basket is useful for smaller cuts when you want that direct flame char without the flat mat surface. A basket gives you more of the open-flame effect. But it requires more attention and more shaking, so for beginners, the mat is easier and more forgiving. Second, finishing with acid makes a real difference. A squeeze of lemon juice or a splash of red wine vinegar right after the vegetables come off the grill lifts the flavor in a way that plain salt and oil cannot. Third, rest your vegetables for two minutes before serving. Same reason you rest a steak: the juices redistribute and the texture settles. Vegetables served directly from the grill onto a plate are usually waterier than ones given two minutes to collect themselves.
If you want to go deeper on which cooking surface works best for different foods, I have written a full breakdown in my comparison of grill mats versus grill baskets. And if you are wondering whether the mat set holds up over a full season of hard use, my long-term review of the same grill mat set covers exactly that, with notes from two full summers of regular grilling on both charcoal and gas.
The mat set that stopped my asparagus from falling into the coals after 20 years of trying everything else.
Six reusable, 100% non-stick mats. Rated to 500 degrees. Dishwasher safe. Works on gas, charcoal, or electric grills. Over 25,000 reviews at 4.6 stars. If you cook vegetables on the grill more than twice a year, it pays for itself before summer is over.
Amazon Check Today's Price on Amazon →